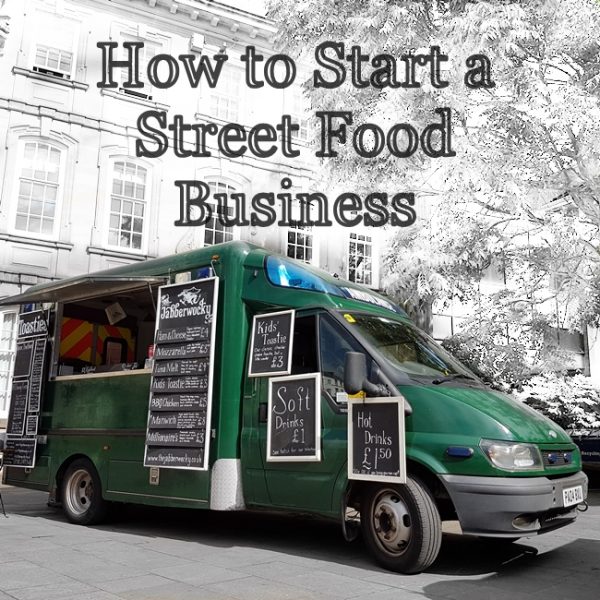
Betty the Bedford has now been out on the road a few times, and it’s high time I finished off the glorious tale of how she came to be. This is a project that is probably beyond the scope of most new street food artists, but might be worth a shot for anyone looking to expand or upgrade. I think all the best street food is a labour of love, and this one is about as laborious as they get. After around 100 Barny-hours we are now the proud owners of a functioning, signed off, DIY street food truck.

Sure, this is a fridge. Mostly this is about our glorious seat covers. Imagine the 70’s design committee that chose those. Timeless.
What we all need here is some useful information for when you come to build your own. It’s a tempting idea these days, because gazebo trading gets old quickly (carrying. rain. cold.) and paying for a conversion can cost tens of thousands of pounds these days. We have covered purchase and construction in earlier posts, so now we are left with kitting it out and patting ourselves on the back because it hasn’t fallen apart.
This van is both a secondary Jabberwocky van and on occasional loan to our new street food company, Yümlaut. That means it needs a varied setup, and that means it needs a grill. With a little creativity you can cook almost anything on a grill, and as long as you didn’t get one of those ribbed-for-extra-pleasure ones they’re easy to clean as well.
For those of you moving out of gazebos a van provides another luxury: the ability to bring a tea urn. Imagine a world where people will literally give you money in exchange for hot water. You now live in that world. Oh happy day.
Fridges! We buy the biggest one that will fit. Fix it down from above rather than screwing it to the floor because physics. This is where the bulk of your weight will be centred when travelling to events (although that may depend on what you’re selling) so make sure the fridge – and anything else heavy – is between the axles rather than hanging out the back.
We end with counters. Either stainless steel, which will have to be manufactured especially for you, custom made counters or off-the-shelf kitchen surfaces which you cut to size. Environmental heath would prefer steel, but the other two are cheaper and much cheaper respectively. Make sure you add a sink. Double-basin with a mixer tap for added health and safety.
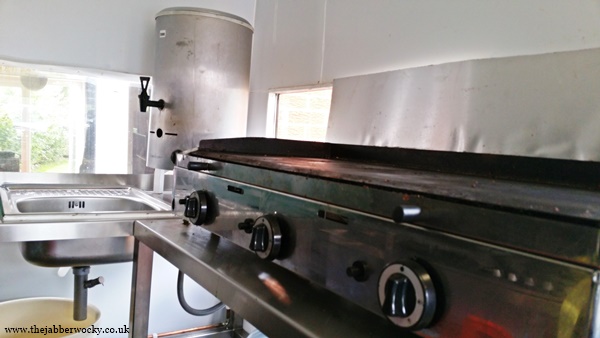
The griddle, the tea urn and the sink.
Barny did all the work apart from actually fabricating the steel surfaces. Prior to that his experience included being handy with the power tools and a keen repairer of things he had just broken. It follows then that most people with a bit of home DIY and butt load of patience could be making their own food van. For anyone who wants to, I’ve gathered together the most useful skills to master before you attempt this, to avoid heart-ache, lost limbs and wasted effort:
I mean I come for the awesome pictures but a fuse box? Inspiring. Really draws the whole post together.
- The commitment to just have a crack at it. Forget everything below; half of this is being willing to learn and going for it, even when you have no idea what you’re doing. Plan on hiding it with sealant later.
- Woodworking: If you are using anything old with a wooden box on the back, you will need work the wood. Oh yes.
- Measuring accuracy: Part of woodworking of course, but worth mentioning. Old, characterful boxes are surprisingly uneven: better results may be achieved with a modern panel van.
- Power-tool usage: We had a drill, a multi tool and a jigsaw. It was enough, and no one lost an arm, which was nice.
- Silicone sealant skillz: You’re making it food-safe, which means sealing EVERYTHING. ALL HAIL THE SEALING GUN.
- Floor-laying: Because otherwise all the things will drop out the bottom. More specifically, you need to be able to lay lino without making a pigs ear of it.
- Vinyl vehicle wraps: if you want to tackle that part.
- Electrics: Please don’t electrocute yourself. Or if you do, don’t blame us. Even if you think you won’t, you will need electricity inside that van. Lights and fridges, at the very least. otherwise you might as well have a gazebo.
- The Great Bodge. When nothing fits and you cannot work out how to get this to just sodding reach that it’s nice to be able to bodge. Although I’d recommend you take a step back and go for a walk round the block first, the solution may (often did) present itself.
- Painting, snagging and cleaning. For the finishing touches.
We will attempt to provide more information on all of these topics in the fullness of time, but this should give you enough to work out if this is even for you. We are currently still very pleased with Betty the Bedford, who has given us one of the great street food goals: double-uniting. You can experience both vans in one place for the first time ever at Leamington Food Festival 2016 on the 10th and 11th of September.


Leave a Reply